One of the best ways to install tomato cages is to use a combination of thin tie-downs with wide suspenders.
This combination allows you to assure the tomatoes sufficient support for growth without burying the supports too deeply.
Installing a tomato growing cage can be a great option if you want a productive tomato crop. This is a great way to grow fresh, healthy, pesticide-free tomatoes. Here are the main steps you will need to follow to properly install a tomato growing cage.
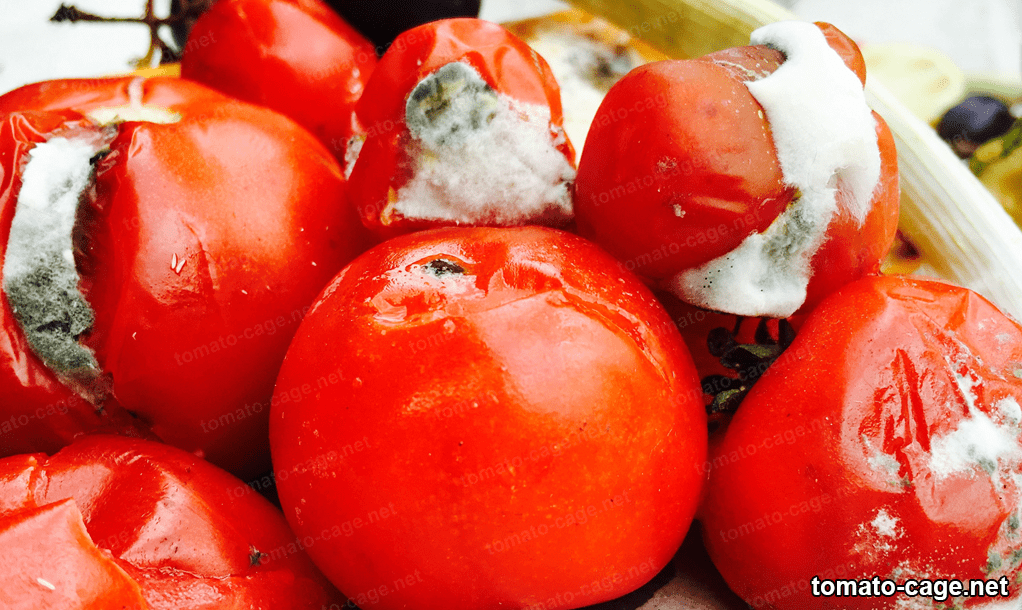
- The first step is to choose a suitable place to install the cage. The ideal place chosen should have enough sunlight that tomatoes need for their development and vice versa, enough shade to avoid excessive heat. It is also advisable to choose an elevated area of your garden to prevent the fruits from getting wet with dew and rotting.
- Once you have decided on the most suitable area for the cage, remove the soil so that you can place the structure correctly. This soil will help form a support for the cage to stand upright and firm. Make sure that the removed soil is free of weeds or anything else harmful to the cage.
- After removing the soil and setting it aside, place the cage and place soil around it to hold it in place. Use stones, bricks or anything else that is solid enough. Make sure the cage is centered or slightly tilted to allow good air circulation and allow watering water to drain downward.
- It is essential to secure the cage to prevent it from blowing over. Attach wooden posts, bricks, stones or even wires to hold everything down. It is also important to have a firm hold on the ends to prevent it from moving in the wind.
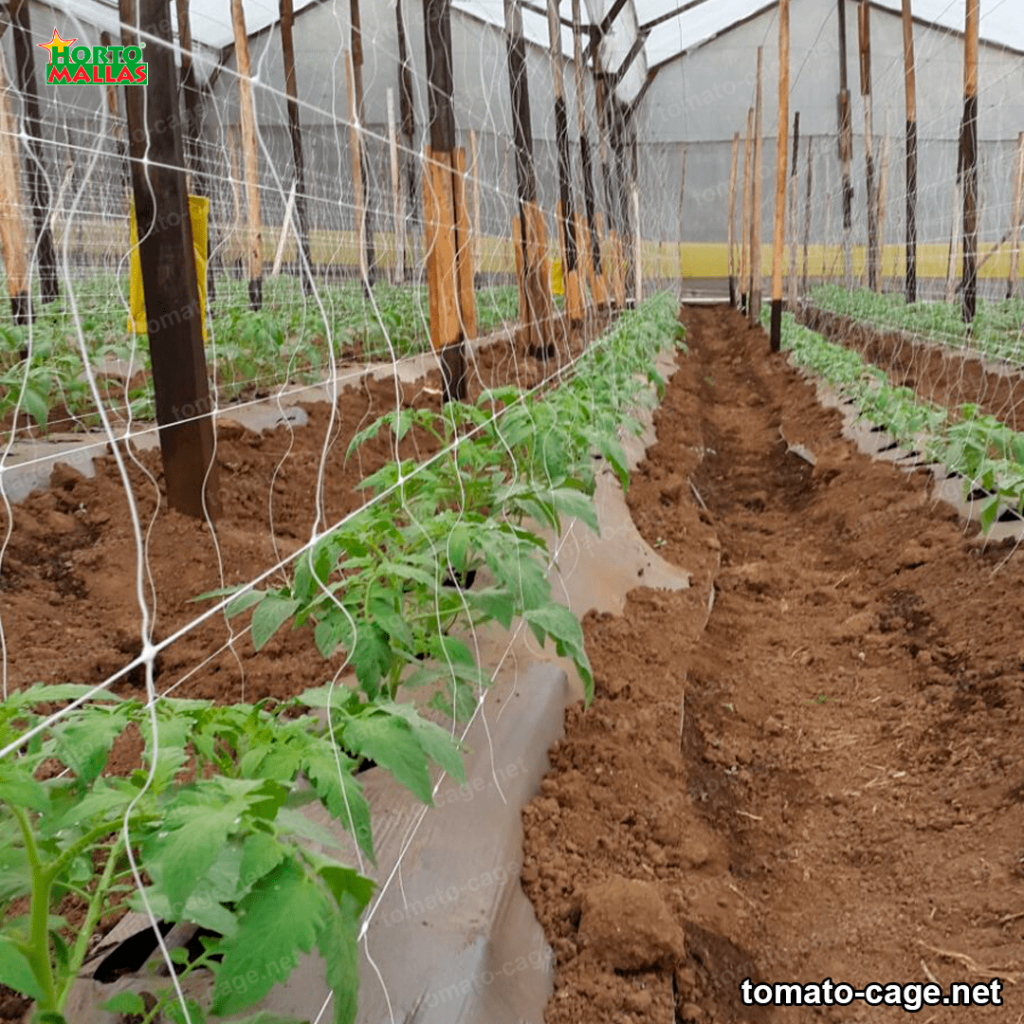
Another way to consider installing tomato cages is vertically.
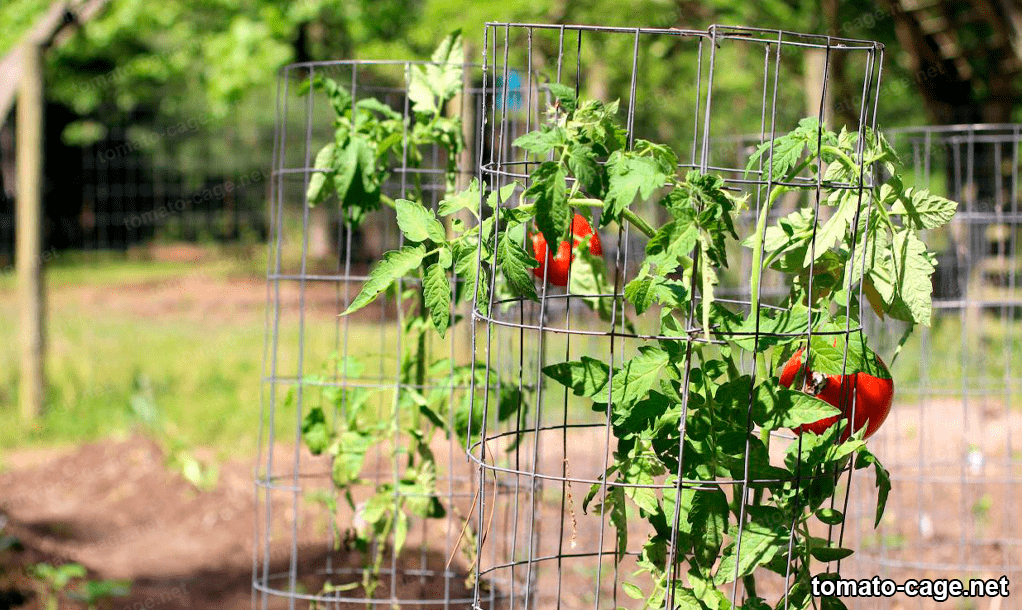
This technique allows the installation of supports at a pre-defined height, using a metal channel instead of nails or wires. This also avoids the need to bury the supports too deeply. After installation, safeguard the tomato growing cage to ensure proper ripening and protect the tomatoes from diseases and pests. Cover the cage supports with mesh or plastic sheeting to prevent excessive sun exposure and reduce the risk of disease and pest infestation in the tomatoes.
Once installed, protect the tomato growing cage to ensure proper ripening and keep the tomatoes free of diseases and pests.
To remove the passive voice:
Cover the supports of the cage with mesh or plastic sheeting to prevent excessive sun exposure and reduce the risk of diseases and pests infecting the tomatoes. At the same time, allowing air to escape and circulate, the netting or plastic protects the tomatoes from excess moisture.
Properly installing a tomato growing cage helps growers get the best results from their crop. It is important to secure the cage well, in order to provide optimal stability and support for the tomatoes during their ripening. With the help of the methods described here, growers do not have to bury the supports too deeply, thus saving time and effort at the time of installation.
Tools to consider to install my vegetable garden correctly
The installation of tomato growing cages is a process that requires the use of various tools and resources. These include basic items such as a power saw, screwdriver, hammer, pliers, ruler, stapler, Phillips screwdriver, pill bits, levels, welder, and tape. With all these tools, the farmer can prepare and install the area for cultivation in the most appropriate way to obtain the best results.
A power saw should be used to cut the metal sections needed to fabricate the cage.
Once you have the parts, use the screwdriver to assemble them. The farmer must also have a hammer to hammer in the stringers that reinforce the cage formation. The stringers act as support points and secure the cage sections. Pliers will be used to secure the cage hardware and ensure greater security.
Adhesive tapes, in addition to gluing the flexible material onto the frames, also help to reinforce the assemblies and prevent possible water leaks or electrical shocks. The use of a ruler and a Phillips screwdriver are useful for accurate measurements. This is necessary to check if the space inside the cage is sufficient for the correct development of the crops. Pill bits are essential for nailing the stringers into the corners of the cage. This will help increase safety and provide support for the higher parts of the cage.
Usada
- Fill the cage with good quality soil, mixed with compost and a little sand to facilitate drainage. Once it is well mixed, water a little to moisten it.
- Finally, you need to plant the tomatoes in the cage. When growing tomatoes, it is important to remember that they must have enough space between each other for them to develop well. You can use either seeds or seedlings. It is always better to use seedlings as this will allow for a much faster harvest.
By following the steps provided above, all garden enthusiasts will be able to set up a tomato growing cage without any problems.
Always remember to follow the instructions provided and use the right materials to maintain the safety and stability of the cage. Greater care and dedication to the care of the cage will allow for the best results in tomato harvesting.
All of these tools are necessary for the assembly of tomato growing cages. Proper use of these tools will ensure a successful installation process to get the best results in your crops.